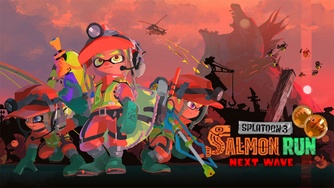
Salmon Run La Nouvelle Vague

Vous voulez nous aider à la compléter ?
Pensez à vérifier que cette page est à jour avec son contenu d'Inkipedia EN !

| Type | Multijoueur en ligne Multijoueur local |
| Joueurs | 1-4 |
| Manettes | |
| Date de sortie | Dès la sortie |
- Pour l'itération de ce mode de jeu dans Splatoon 2, voir Salmon Run.
Salmon Run - La nouvelle vague est un mode multi-joueur dans Splatoon 3 pour jusqu'à quatre joueurs. Il se déroule à la suite de Salmon Run dans Splatoon 2 et a été révélé 9 février 2022 durant un Nintendo Direct.
Description
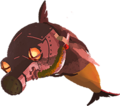
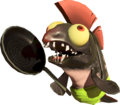
Comme dans Splatoon 2, chaque [shift] consiste de trois vagues; pour compléter chaque vague, les joueurs doivent collecter des Golden Eggs en liquidant desBoss Salmonids et les déposer dans le egg basket pour atteindre le quota. Sauf si indication contraire, chaque Boss Salmonoïde fait apparaître trois œufs une fois liquidé. S'ils ne sont pas récuperés, un Barboteur viendra en volant après quelques secondes pour les ramener.
Chaque joueur ne peut porter qu'un seul [Golden Egg] à la fois. Pendant qu'il en porte un, le joueur peut appuyé sur ou pour le lancer, la trajectoire de ce lancer est un arc de cercle similaire à celui des bombes lancés. Lancer un œuf requiert autant d'encre qu'une bombe splash, cependant autant d'encre n'est pas consommée et l'encre peut être rechargé dès le lancer effectué. Une petite explosion d'encre est causé autour du joueur, par les lancers faisant 100 dégâts aux Salmonoïdes et encre aussi une petite zone autour du joueur.
If the egg is thrown directly into the egg basket, it is collected: otherwise, it remains on the ground where it lands and does not roll. Throwing a Golden Egg into the water results in it bouncing back to where it was thrown from; if it hits a wall or a Salmonid, it is deflected and changes its trajectory. Any player may pick up a Golden Egg as normal after it has been thrown.
The quota for each of the three waves depends on the number of players present and their ranks. If the quota is not filled before the wave timer ends or the team is wiped out, their shift is terminated. After a shift ends, players are rewarded Grizzco Points based on the amount of Power Eggs and Golden Eggs collected, which can be exchanged for bonuses. All players' ranks increase by 20 points after clearing a shift, unless they are playing with a friend with a lower job title than themselves (note that Profreshionals can gain points with Eggsecutive VPs since Version 1.1.1). Similarly, failing a shift reduces all participants' ranks by between 0 and 20 points based on the number of waves cleared (-20 points on the first wave, -10 on the second, and 0 on the third; the deduction is halved if at least one teammate has disconnected). Thus, failing a shift on wave 3 does not change participants' ranks.
The hazard level of a shift determines both the difficulty of the shift, such as how many bosses spawn in a time period, and determines the odds of getting silver or gold scales from an Xtrawave encounter. The hazard level is determined by a formula using the combined rank of all players in the shift. The hazard level for a completed shift can be checked by opening the Recent Jobs list from the menu in Grizzco or via SplatNet 3 (note that the display is rounded to the nearest integer but not internally), which can be used to estimate what the hazard level of the next shift will be. The maximum hazard level possible is 333%, which can only occur for a team whose ranks average Eggsecutive VP 865 or above.
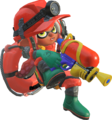
Equipment for collecting eggs is provided by Grizzco, including a Grizzco uniform and a lifesaver, as well as a different supplied main weapon for each wave and two uses of a single special weapon for each shift. When players are splatted, their lifesaver appears at their last position and a teammate can revive them by inking them. Ink level and special weapon uses are displayed visually, with the lifesaver serving as an ink tank with markings, and the player's two specials appearing as packets on their headgear. Additionally, a notification saying "One player left!" now appears when only 1 player is still alive.
Known Occurrences return from Splatoon 2, with new ones being added, such as Mudmouth Eruptions and Giant Tornado.[1] Additionally, an event called Big Run, where Salmonids invade inhabited cities, happen once every few months and take place on battle stages.[2] There are also occasional Eggstra Work shifts, being 5 waves long on a fixed job scenario, with the aim being to retrieve as many Golden Eggs as possible.[3]
The difficulty of Salmon Run Next Wave is considerably higher than Salmon Run in Splatoon 2, with the hazard level, quota, and spawn rates increasing drastically, partially due to the ability to throw Golden Eggs, and the new mobility provided by moves such as Squid Surging and Squid Rolling. Because of this, the game can begin to slow at higher levels unless players maintain control of the bosses. Prior to Version 6.0.0, players no longer reset to 400 upon the termination of a rotation, instead resetting back to 40, making the time taken to reach max hazard level and EVP 999 much longer.
Xtrawave
- Article principal: Xtrawave
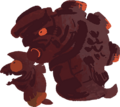
Occasionally, after a successful third wave, an Xtrawave occurs, during which a large King Salmonid and multiple other Boss Salmonids appear. The primary objective is not to deposit eggs but to defeat the King Salmonid. During this wave, players are supplied with egg cannons; these convert Golden Eggs into powerful projectiles that deal 800 damage each[4] and do not consume ink, but break on contact (even if they hit the ground). The egg cannon can be used to splat all Lesser Salmonids and most regular Boss Salmonids in one shot by hitting their weak point (if applicable), and they are largely used to damage the King Salmonid. If the player is holding an egg, a special weapon-esque notification encourages them to attack the King Salmonid with it. Players have 100 seconds to defeat the King Salmonid, and the wave ends prematurely if no players remain alive. If players fail to defeat the King Salmonid, the shift is still considered cleared.
If an Xtrawave is due to occur, the victory jingle after wave 3 will be slightly distorted, and the final triumphant horn will be immediately followed by a siren and a large, orange notification saying "EMERGENCY!". This is then followed by a short cutscene of the King Salmonid emerging from the water and roaring. The crew members then Super Jump back to the start point, or a unique lowered start point if the third wave was low tide, and the text "XTRAWAVE" will appear as they land. The Xtrawave also takes place with a unique red sky, rather than the normal orange sky or the night environment used for most Known Occurrences, and will use the same tide level as the previous wave (i.e. if wave 3 took place at high tide, the Xtrawave will too).
An Xtrawave is guaranteed to occur when the Salmometer, a King Salmonid-shaped meter appearing below the player's rank bar while they are in the Grizzco Lobby, is full for every player in the group. Otherwise, the chance of an Xtrawave occurring scales based on the total value. A minimum team smell of 5 is required for the chances of an Xtrawave occurring to begin.[5] The meter fills after every shift, whether successful or not, and empties for everyone in the party when the special wave occurs. The Salmometer also resets between different rotations. If everyone in a team starts with a smell of 0, the chance of an Xtrawave happening is 0% for the first two rounds, 10% for the 3rd round, 30% for the 4th round, 60% for the 5th round, and 100% for the 6th round, if no Xtrawave happens until the 6th round.[6] Until wave 3 is complete, there is no way of knowing whether or not a shift will result in an Xtrawave, unless one is aware of the Salmometer levels of their teammates.
Fish scales
Damaging the King Salmonid during an Xtrawave rewards the player with fish scales, a precious resource that has three types: bronze, silver, gold; the less common varieties of which are associated with higher hazard levels.[7] Fish scales can be exchanged for Splashtag banners, locker room items, and Grizzco-approved alternate work outfits.[7]
The Xtrawave grants the player scales ranging from 2 to 13; two for entering the Xtrawave, one for every 12.5% damage the team dealt to the King Salmonid (a maximum of eight for a victory), and one for every ten seconds remaining on the clock when the King Salmonid is defeated (a maximum three for 30 seconds or more left).[8]
Getting silver and gold scales is random, with the chance percentage correlates to the hazard level using the formula 5 + 15/333 * H for silver and 3/333 * H for gold, where H stands for hazard level percentage. At max hazard level (333%), there is a 20% chance per scale to be silver, and a 3% chance per scale to be gold.[8][9] The list below shows some calculated examples.
| Hazard level | Silver fish scale | Gold fish scale | Team average rank for that hazard level |
|---|---|---|---|
| 0% | 5% | 0% | Apprentice 0/99 |
| 20% | 5.9009% | 0.1802% | Part-timer 0/99 |
| 111% | 10% | 1% | Profreshional +1 55/99 |
| 130% | 10.8559% | 1.1712% | Profreshional +2 50/99 |
| 168% | 12.5676% | 1.5135% | Eggsecutive VP 40 |
| 200% | 14.0090% | 1.8018% | Eggsecutive VP 200 |
| 222% | 15% | 2% | Eggsecutive VP 310 |
| 333% (max.) | 20% | 3% | Eggsecutive VP 865+ |
Big Run
- Article principal: Big Run
Big Runs are a special event where Salmonids invade the city, causing a multiplayer stage to become a temporary Salmon Run stage. Players can then fight against the invading Salmonids and collect their Golden Eggs on the reworked stage. Big Runs share similarities to Splatfests, as they are announced one week in advance, last for 48 hours, and feature final results with rewards for participating players.
Eggstra Work
- Article principal: Eggstra Work
Eggstra Work is a special event involving shifts lasting 5 waves, on a fixed job scenario, with the aim being to score as many golden eggs as possible. Similarly to Big Runs, players are awarded prizes after the end of the Eggstra Work based on their performance relative to the playerbase at large.[3] Unlike Big Runs, these run concurrently with the regular Salmon Run stage rotations, allowing players who do not wish to participate/are unable to participate in the Eggstra Work to still play regular Salmon Run.
Rotations
Unlike in Splatoon 2, Grizzco Industries is almost always open for business - this includes during Splatfests. The only exception is during server maintenance, during which all multiplayer services are disabled.[2]
Salmon Run rotations usually change every 40 hours (a day and 16 hours). Rotation change happens at 00:00, 16:00, or 08:00 UTC, in order and repeating. However, Big Runs always start at 00:00 UTC, therefore disrupting the usual schedule. The Salmon Run rotation immediately preceding the Big Run will be shortened or lengthened to fit the schedule of the Big Run, with the shortest duration being 24 hours, and the longest being 56 hours. The rotation following the Big Run keeps the usual duration.
Big Run rotations last for 48 hours (two full days), presumably always starting (and then ending) at 00:00 UTC. Big Runs only happen once per season, and usually in place of that month's Splatfest. Any player can play in a Big Run, regardless of rank. Finally, unlike most regular rotations, Big Runs are publicly announced in-game a few days in advance of occurrence. After a Big Run ends, the normal rotation schedule resumes immediately.
Loaned weapons
Almost all main weapons are usable in Salmon Run Next Wave, with the exceptions being the Splatterscope and the E-liter 4K Scope. The damage dealt by main weapons is adjusted for Salmon Run when compared to other multiplayer modes, especially for charging weapons or weapons with slow firing rates - for example, the Splat Roller deals 200 damage rather than the usual 150 with a horizontal flick, while the Heavy Splatling and Nautilus 47 are both buffed to deal 35 damage per shot when fully-charged. The dummies in the Salmon Run waiting area reflect these changes to damage scaling.
Like in Splatoon 2, the only sub weapon available in Salmon Run Next Wave is the Splat Bomb.
Unlike in Splatoon 2, there are more than four special weapons available in Salmon Run Next Wave. Special weapons are loaned out at random at the beginning of each shift, do not change between waves, and are unaffected by rotations. Since Version 6.0.0, a team will always be assigned at least two "long-range" specials (marked with a ‡ in the list below). The available special weapons are:
 Crabe d'assaut ‡
 Haut-perceur 5.1 ‡
 Jolizator ‡
 Trimissile tornade ‡
 Chromo-jet ‡
 Cavalsquale
 Sonar paf
 Kraken royal (since Version 6.0.0)
 Triple choc chromatique (since Version 6.0.0)
Each player receives two of their assigned special to use during the regular waves. If an Xtrawave occurs, all players are given one use of their special for that wave. Any specials that go unused in the regular waves cannot be carried forward to the Xtrawave.
Stages
There are seven stages available for Salmon Run Next Wave.
| Image | Name | Description | Release Date |
|---|---|---|---|
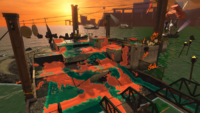 |
Spawning Grounds | Returning from Splatoon 2, Spawning Grounds is set near a large dam in the Inkadia region, with minimal changes. It features a wide variety of terrain on each corner of the map. A multilayered slope leading to three small piers is located just behind the basket. To the right is a grated walkway overlooking the lower grounds. To the left, slopes go down to small sandbar. During low tide, the sandbar expands exponentially, revealing three protruding landmasses. | Initial release |
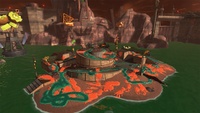 |
Sockeye Station | Sockeye Station is set in a setting similar to that of Spawning Grounds, but appears to be in the Splatlands. It was first shown off in the first Salmon Run Next Wave trailer.[11] It features a large, elevated platform in the center, which has spiraling ramps leading to the top. There is a sandy shore and a long dock on the bottom. During low tide, there are walkways leading to the water. | Initial release |
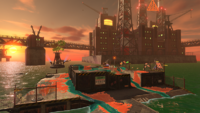 |
Gone Fission Hydroplant | Gone Fission Hydroplant is set next to a massive hydroplant in the ocean. It features large, elevated walls surrounding the egg basket. There are ramps leading to the top of the platforms. Ramps and gaps in the wall lead to the surrounding low ground. There is a grate over one of the gaps, functioning as a bridge. During low tide, platforms are revealed over the water, with many gaps. | Initial release |
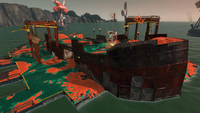 |
Marooner's Bay | Returning from Splatoon 2, Marooner's Bay is set on the wreckage of a large boat, with minimal changes. It features a large ship marooned on a sandbar. Its stern has three ramps down onto the beach where there are three piers on the starboard side. During low tide, a sandbar rises behind the ship, revealing a large ring of land and one smaller protrusion. This stage contains propellers which Inklings and Octolings can use to power lifts that rise from the ground. | 1 décembre 2022 |
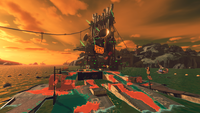 |
Jammin' Salmon Junction | Jammin' Salmon Junction is set on a collapsed multilane highway, which has been turned into a concert venue. It features long, uphill terrain with the egg basket at the top area. It is all divided by a long body of water in the center, which opens up into a larger pit. There are lower side areas. On the top there is a long grated bridge on the side, over the lower ground, and a small grate in the center. On low tide, there are two long pathways, also divided by a thin body of water. | 1 juin 2023 |
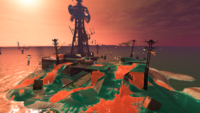 |
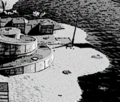
Salmonid Smokeyard | Returning from Splatoon 2, Salmonid Smokeyard is set on a small island with two lone structures. Ramps on each structure lead down to the sandbar while propeller platforms connect the tops of both structures. In the crevice between the two structures is a long rectangular pool of water. During low tide, a large dock reveals itself to the side of the island. | 1 septembre 2023 |
|
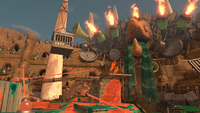
Bonerattle Arena | Bonerattle Arena is set in an abandoned prison that has been converted into a dueling arena by Salmonids. It is centered around an octagonal platform with the egg basket in the center, and is the only Salmon Run stage to feature inkrails. | 1 mars 2024 |
Big Run stages
Big Run is an occasional event in Salmon Run Next Wave, in which the Salmonids invade the Splatlands and/or Inkopolis. Each time a Big Run occurs, the Salmonids invade one particular multiplayer stage, changing its layout and flooding it with water for the duration of the event.
| Stage(s) | Description | Big Run(s) | Arme rare(s) | Salmonarque(s) |
|---|---|---|---|---|
 Parc Carapince |
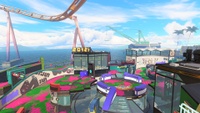
Parc Carapince a été le premier stage multijoueur à être envahis lors d'un Big Run. Elle a été révélée lors du Splatoon 3 Direct et a été montrée à nouveau dans la bande-annonce d'annonce de la Saison du frimas 2022. | 10 décembre 2022 to 12 décembre 2022 | Salmotori | |
 Institut Calam'arts |
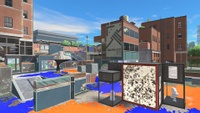
L'Institut Calam'arts a été le second stage envahis à l'occasion d'un Big Run. Elle a été révélée dans une promotion pour la Saison des bourgeons 2023 le 20 février 2023. Lors de ce Big Run, le Salmophide a fait sa première apparition lors des VAGUE +. | 4 mars 2023 to 6 mars 2023 | Salmophide | |
 Réservoir Rigadelle |
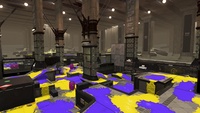
Réservoir Rigadelle a été le troisième stage envahis à l'occasion d'un Big Run. C'est le premier stage de la Contrée Clabousse à faire partie d'un Big Run. Elle a été révélée dans une promotion pour la Saison du soleil 2023 le 19 mai 2023. | 10 juin 2023 to 12 juin 2023 | Salmotori, Salmophide | |
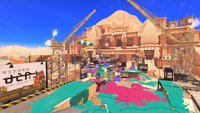 Ruines Um'ami |
Ruines Um'ami a été le quatrième stage envahis à l'occasion d'un Big Run. Elle a été révélée dans une promotion pour la Saison des averses 2023 le 17 août 2023. Lors de ce Big Run, les Arme double M. Ours SA ont été disponibles pour la première fois. | 2 septembre 2023 au 4 septembre 2023 | Salmotori, Salmophide | |
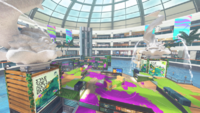 Halles de Port-merlu |
Halles de Port-merlu a été le cinquième stage envahis à l'occasion d'un Big Run. Elle a été révélée dans une promotion pour la Saison du frimas 2023 le 15 novembre 2023. Lors de ce Big Run, le Salmodon a fait sa première apparition lors des VAGUE +. | 2 décembre 2023 au 4 décembre 2023 | Salmodon | |
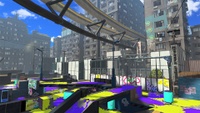 Banlieue Balibot |
Banlieue Balibot a été le sixième cstage envahis à l'occasion d'un Big Run. Elle a été révélée dans une promotion pour la Saison des bourgeons 2024 le 23 février 2024. | 9 mars 2024 to 11 mars 2024 | Salmodon, Salmophide, Salmotori | |
      Plusieurs sites Parc Carapince, Institut Calam'arts, Réservoir Rigadelle, Halles de Port-merlu, Ruines Um'ami, Banlieue Balibot |
Pendant l'Ultra Big Run, les six stages précédemment envahis sont de ouveau disponible de façon aléatoire. Le retour des anciens stage a été promus pendant la bandone annonce de la Saison du soleil 2024 le 16 mai 2024 et confirmer sur les réseaux sociaux le 24 mai 2024. | 8 juin 2024 au 10 juin 2024 | Normal: Exclusives aux VAGUE +: |
Triumvirate |
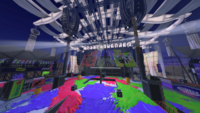 |
lieu sur la scène du Grand Festival durant le week-end précédent le festival. L'invasion a été révélé sur les réseaux sociaux le 23 août 2024. | 7 septembre 2024 to 9 septembre 2024 | Triumvirate |
Wildcard rotation
Wildcard rotations return in Salmon Run Next Wave, the first started on 1 octobre 2022 at 16:00 (UTC).[12] All types of wildcard rotations from Splatoon 2 return, including all-wildcard rotations, single wildcard rotations, in which only one of the four weapons is random, and rare-only rotations[13].
During an all-wildcard rotation, or a rare-only rotation, the only weapon available in the testing range is the Splattershot. After a shift ends, players are still equipped with the weapon they ended the shift with in the testing range, but it is replaced with the Splattershot when the bihourly multiplayer stage rotation happens, or when they interact with the weapon-equipping container. During single-wildcard rotations, players may only equip the non-wildcard weapons in the testing range.
Grizzco-brand weapons return for wildcard rotations and four new weapons, the Grizzco Stringer, Grizzco Splatana, Grizzco Dualies, and Grizzco Roller, have been added.
For a history of wildcard rotations, see Salmon Run Next Wave data.
Events
- Article principal: Known Occurrence
There are nine different events in Salmon Run Next Wave, with some having variants. Seven of the events return from Salmon Run in Splatoon 2.
- Water Levels (high and low tides)
- Rush
- Fog
- The Griller
- Cohock Charge
- Goldie Seeking
- The Mothership
- Mudmouth Eruptions[1][14]
- Giant Tornado[14]
Job scenario
A feature added in Version 2.0.0 allows saving and replaying job scenarios. It allows players to replay a previous Salmon Run shift. Job scenarios can be accessed from the Grizzco Terminal, and can be shared via codes. These job scenarios can also be viewed from SplatNet 3. Big Run and Eggstra Work job scenarios cannot be saved. Unlike Battle replays, the players' inputs are not saved. Due to this, it is not possible to watch a replay of the original shift. Players must play the job scenarios using Private Jobs.
Job title
| “ | The Profreshional title has been usurped by Eggsecutive VP, providing a shining new rung on the corporate ladder. Your earning power will increase with a higher title, but the job sites will get more intense too.
We've even recorded a 333% increase in hazard level at the sites where Eggsecutive VPs work. |
” |
All job titles from Splatoon 2 return. A new title, Eggsecutive VP[7], has been added following the Profreshional title.
| Title / Rank | Pay Grade (Rank Points 0 - 49) |
Pay Grade (Rank Points 50-99) |
IDV | Hazard level range |
|---|---|---|---|---|
| Intern (2 tutorials) | ×1.00 | ×1.00 | N/A | N/A |
| Apprentice (0 - 99) | ×1.50 | ×1.55 | 0 - 99 | 0.0% - 19.8% |
| Part-Timer (0 - 99) | ×1.60 | ×1.65 | 100 - 199 | 20.0% - 39.8% |
| Go-Getter (0 - 99) | ×1.70 | ×1.75 | 200 - 299 | 40.0% - 59.8% |
| Overachiever (0 - 99) | ×1.80 | ×1.85 | 300 - 399 | 60.0% - 79.8% |
| Profreshional (0 - 99) | ×1.90 | ×1.95 | 400 - 499 | 80.0% - 99.8% |
| Profreshional +1 (0 - 99) | ×2.00 | ×2.05 | 500 - 599 | 100.0% - 119.8% |
| Profreshional +2 (0 - 99) | ×2.10 | ×2.15 | 600 - 699 | 120.0% - 139.8% |
| Profreshional +3 (0 - 99) | ×2.20 | ×2.25 | 700 - 799 | 140.0% - 159.8% |
| Eggsecutive VP (0 - 999) | ×2.30 | ×2.35 See below for EVP ≥100 |
800 - 1665 | 160.0% - 333.0% |
At Eggsecutive VP, the pay grade is calculated as 2.3 + floor([Rank Points] / 50) × 0.05. The highest possible pay grade is ×3.25 at Eggsecutive VP 950 - 999.
IDV stands for internal difficulty value and is how the game keeps track of the difficulty without using job titles and rank points. One IDV is worth 0.2% hazard level, which is capped at 1665 for Eggsecutive VP 865 - 999, equivalent to hazard level 333%.
As in Splatoon 2, titles are retained across Salmon Run rotations, but the point ranges are reset to the 40-point mark within the player's current title, including the new Eggsecutive VP title. Beginning in Version 6.0.0, players who have previously earned badges on a particular stage will start new rotations at a higher level within Eggsecutive VP:
- Bronze (for reaching EVP 400): reset to 200
- Silver (for reaching EVP 600): reset to 300
- Gold (for reaching EVP 999): reset to 400
At ranks Go-Getter and above, it is possible to manually demote oneself by pressing in the menu of the Grizzco Lobby.
Rewards
Completion of a round of Salmon Run Next Wave grants players Grizzco Points, which they can redeem at the exchange desk inside Grizzco Industries for bonuses. The points earned after any run are calculated with the formula (G/100)(E+P/200)+50*C, where G is the pay grade number after any raises or penalties, E is the number of Golden Eggs collected, P is the number of Power Eggs collected, and C is 1 upon completing all 3 rounds successfully, 2 upon successfully defeating the King Salmonid, otherwise 0. (However, due to a bug as of Version 1.2.1, C is equal to 2 even if losing to the King Salmonid.) All counts are rounded down to the nearest integer. Players also earn Catalog Points which increase their catalog level (300 points per wave cleared, including if the Xtrawave is cleared). If the player participates in an Xtrawave and damages the King Salmonid, they receive fish scales.[7]
Every 100 Grizzco Points (200/400 after reaching 1200/4000 points in a rotation, or 2400/5200 for a Big Run rotation) earns the player one bonus "capsule", which come in different colors representing the type of the contents, or a piece of gear. The main ability of this item is randomly determined when the bonus is redeemed. It usually has up to three randomly filled secondary gear ability slots. If the player receives gear they already have, they can either replace the old gear with the new version or receive ability chunks (equal to the filled slots) instead. Capsule
Normal, non-superbonus capsules have a 50% chance of providing a poor reward, a 40% chance of providing a good reward, and a 10% chance of providing an excellent reward. At 600 and 1200 points, the player earns a superbonus, which always contains the 10% chance reward. The type of superbonus capsule is fixed for the length of a rotation. After 1200 points, the player only earns the current gear or pink capsules until the rotation ends. During a Big Run, all types of rewards can appear up to 2400 points, with additional superbonuses at 1800 and 2400. The capsules of the rewards until the second superbonus are different for every player.
Pink capsules contain gear aside from the one currently in rotation. During the first gear rotation, when the Bream-Brim Cap was the only gear piece available, pink capsules did not appear as a reward.
The exchange desk stores only a maximum of 99 capsules. Each additional capsule that the player receives without collecting the previous rewards will be lost.
Gear
Gear by Grizzco Industries is obtained from Salmon Run bonus rewards. When obtained, each gear reward has random initial star power and abilities. The star power is initialized from 0 to 2 stars with all secondary ability slots filled, while the initial primary ability cannot be any primary-exclusive one. If the player receives gear they already have, they can either replace the old gear with the new version or exchange the new gear for ability chunks (equal to the secondary abilities, but not the primary ability) instead. A new piece of gear is added each month, similar to Splatoon 2. Capsule
Shop

By defeating or damaging a King Salmonid, players are rewarded with fish scales that they can use to purchase work suits, gear, decorations, stickers, or banners. Most items are locked by default, however, the rest are unlocked by spending more scales. There are two milestones for spending scales at the shop. The first milestone requires spending at least ![]() 100 and
100 and ![]() 10 to unlock, while the second milestone requires spending at least a total of
10 to unlock, while the second milestone requires spending at least a total of ![]() 350,
350, ![]() 40, and
40, and ![]() 4. All items are made purchasable after the second milestone is reached.
4. All items are made purchasable after the second milestone is reached.
Work Suits
- Article principal: Work suit
Gear
- Article principal: Gear
| Name | Cost | Purchasable? |
|---|---|---|
| Initially | ||
| Initially | ||
| Initially | ||
| Initially | ||
| Initially | ||
| Initially | ||
| Initially | ||
| After 1st milestone | ||
| After 1st milestone | ||
| After 1st milestone | ||
| After 1st milestone | ||
| After 1st milestone | ||
| After 1st milestone | ||
| After 1st milestone | ||
| After 1st milestone | ||
| After 2nd milestone | ||
| After 2nd milestone | ||
| After 2nd milestone | ||
| After 2nd milestone | ||
| After 2nd milestone | ||
| After 2nd milestone | ||
| After 2nd milestone | ||
| After 2nd milestone | ||
| After 2nd milestone | ||
| After 2nd milestone |
Decorations
- Article principal: List of locker decorations in Splatoon 3
| Name | Cost | Purchasable? |
|---|---|---|
 Flipper-Flopper Flipper-Flopper
|
Initially | |
 Scrapper Scrapper
|
Initially | |
 Chinook Chinook
|
Initially | |
 Steelhead Steelhead
|
Initially | |
 Golden Egg box Golden Egg box
|
Initially | |
 Smallfry Smallfry
|
Initially | |
 Salmonid Rush wave Salmonid Rush wave
|
Initially | |
 Fish Stick Fish Stick
|
After 1st milestone | |
 Maws Maws
|
After 1st milestone | |
 Mothership Mothership
|
After 1st milestone | |
 Mudmouth Mudmouth
|
After 1st milestone | |
 Stinger Stinger
|
After 1st milestone | |
 Chum Chum
|
After 1st milestone | |
 Snatcher Snatcher
|
After 1st milestone | |
 Griller Griller
|
After 2nd milestone | |
 Drizzler Drizzler
|
After 2nd milestone | |
 Slammin' Lid Slammin' Lid
|
After 2nd milestone | |
 Flyfish Flyfish
|
After 2nd milestone | |
 Big Shot Big Shot
|
After 2nd milestone | |
 Cohock Cohock
|
After 2nd milestone | |
 Steel Eel Steel Eel
|
After 2nd milestone | |
 egg basket egg basket
|
After 2nd milestone | |
 Goldie Goldie
|
After 2nd milestone |
Stickers
- Article principal: List of locker stickers in Splatoon 3
Banners
- Article principal: Banner
Badges
- Article principal: Badge#Salmon Run Next Wave
Changes from Salmon Run in Splatoon 2
There are multiple changes between Salmon Run Next Wave and Salmon Run, including:
- The Test Range serves as the lobby and shop where rewards are given and fish scales can be traded, as well as the current weapons available can be tested.
- The training area now allows players to call any Boss Salmonid they want to practice on, instead of going through a specific order.
- Players can now choose the gear they wear during Salmon Run and set up private matches between friends outside of the Shoal.
- Matches can no longer start with fewer than four players. Instead, the player must try again to find players if matching takes longer than 160 seconds.
- In matches, the host of the room is not always the player who creates it, instead being the player who has the fastest and most stable network.
- Players have the ability to throw Golden Eggs to reach their quota more easily, with the quotas increasing in number to compensate.
- The highest rank is no longer Profreshional, instead, it is Eggsecutive VP, which is four ranks greater.
- At the highest rank, players no longer start with rank points based on the previous shift, with it being determined by their highest badge for the ongoing map instead.
- The moon is no longer visible during Known Occurrences, and the sky becomes considerably darker as a result.
- The Mothership now makes splashes when it appears from and re-enters the water.
- Goldie Seeking has been greatly altered, with Lesser Salmonids no longer spawning from incorrect Gushers. Instead, they spawn constantly from the shore in smaller numbers, as well as from the Gusher that the Goldie is inside of, making these waves considerably easier.
- Fishing Frenzy no longer plays during the Mothership and Goldie Seeking, instead being replaced by Frothy Waters.
- Scoped chargers can no longer appear as weapons in rotations, nor be given during wildcard rotations.
- An Xtrawave can sometimes occur after a shift, containing a boss fight with a King Salmonid and providing the player with fish scales once it is damaged and the shift is over.
- Four new Boss Salmonids can appear: Fish Sticks, Big Shots, Flipper-Floppers, and Slammin' Lids.
- Steelhead explosions are now much larger and deal more damage, as well as inking a larger area.
- Flyfish behavior is now constant once weakened regardless of which basket was damaged, the remaining one now only targets the closest player.
- Two new Known Occurrences can occur: Mudmouth Eruptions and Giant Tornadoes.
- Enemies can now use the propeller lifts on Marooner's Bay to reach the basket faster if a targeted player lifts it up for them.
- Salmonid pathing is no longer bound by nodes, making Lesser Salmonids and Goldie movement much more direct. When combined with the increased damage and knockback from lessers, this makes lessers much more dangerous than in Splatoon 2.
- Snatchers now fly, can carry up to eight Golden Eggs, and escape faster than their grounded counterparts from the prior game.
- The overall difficulty peak is greater, having more bosses, higher quotas, and a higher hazard level than the previous game. This in turn causes gameplay to slow at higher levels if players do not manage bosses correctly.
- Many of the lines from Mr. Grizz, especially those which describe known occurrences, have changed, and notably have a friendlier tone than in the previous game.
Quotes
| “ | SRL HR dept. here. No, it's not another mandatory seminar about conserving printer toner. Rather, we're confirming that Salmon Run is available 24/7 in the Splatoon 3 game! That means you can work nonstop to climb the corporate salmon ladder - maybe all the way to Eggsecutive VP!
Now, at the end of the day, it's all about that paycheck. And we think Salmon Run workers are handsomely rewarded! Diligent employees who have collected fish scales can trade them in for bonus items like designer work suits. As always, we support a healthy work-splat balance. |
” |
| “ | Salmon Run is open for business 24/7 in #Splatoon3, and you can team up with friends in private lobbies too! If you defeat the big 'ol King Salmonid, you may earn some rare fish scales that can be exchanged for snazzier uniforms. | ” |
— @NintendoEurope on Twitter[17]
| ||
Dialogue
| Voir la page de citations. |
Gallery
Artwork and renders
-
Logo
-
Salmon Run Next Wave logo with a blank background
-
Key art (vertical)
-
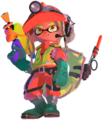
Inkling in uniform, holding the Splattershot
-
Another Inkling in uniform, holding the Classic Squiffer
-
An Octoling in uniform, holding the Tri-Stringer
-
Render of an Inkling in uniform
-
Alternative pose
-
Alternative pose
-
Another Inkling
-
Designer work suits
-
Returning work suits from Splatoon 2's Salmon Run, introduced in Fresh Season 2023
-
Alternative poses
-
All of the different Salmonids, prior to Horrorboros
-
Chum
-
Chums and a Cohock
-
Egg cannon used to throw Golden Eggs
-
Promo for the Salmon Run Next Wave-themed icon elements for Nintendo Switch Online
Icons
-
SplatNet 3 icon
Salmonid Field Guide
-
Water Levels (High and Low Tides)
-
Rush
-
Fog
-
Cohock Charge
-
Goldie Seeking
-
The Mothership
-
Mudmouth Eruptions
-
Giant Tornado
Promotional screenshots
In-Game screenshots
Trivia
- The Salmometer is internally referred to as "smell". This, as well as wording in the Employee Handbook, may imply that the Salmometer is a metaphor for the King Salmonid gradually learning the scent of the crew members as they keep returning to the same location.
- As of Version 6.0.0, the Salmometer reflects the type of King Salmonid that will appear in the case of an Xtrawave, whereas it would previously always be shaped like a Cohozuna.
- The first ever Salmon Run Next Wave rotation on 8 septembre 2022, which took place on Sockeye Station, had the weapons Splattershot Jr., Splat Dualies, Splat Roller, and Splat Charger. This weapon combination is identical to the first ever Salmon Run rotation in Splatoon 2 (which took place on Spawning Grounds).
- This stage and weapon combination were later reused on 24 décembre 2023.
- The Grizzco helicopter seen in Salmon Run Next Wave has collision. Ordinary this cannot be seen due to the helicopter flying far out of reach, but on extremely rare occasions during a lag spike, players can collide with it when Super Jumping back at the end of a shift.[18]
Names in other languages
| Langue | Nom | Signification |
|---|---|---|
| サーモンラン NEXT WAVE Sāmon ran NEXT WAVE |
Salmon Run NEXT WAVE | |
| Salmon Run - Die nächste Welle | Salmon Run - The next wave | |
| Salmon Run - Nueva ofensiva | Salmon Run - New offense | |
| Salmon Run - Prossima ondata | Salmon Run - Next wave | |
| Salmon Run - De nieuwe golf | Salmon Run - The new wave | |
| Salmon Run - Новая волна Salmon Run - Novaya volna |
Salmon Run - New wave | |
| 鲑鱼跑 NEXT WAVE Guīyú pǎo NEXT WAVE |
Salmon Run NEXT WAVE | |
| 鮭魚跑 NEXT WAVE Guīyú pǎo NEXT WAVE (Mandarin) gwai1 jyu2 paau2 NEXT WAVE (Cantonese) |
Salmon Run NEXT WAVE | |
| 새먼 런 NEXT WAVE Saemeon reon NEXT WAVE |
Salmon Run NEXT WAVE |
| Langue | Nom | Signification |
|---|---|---|
| バイトシナリオ baito shinario |
Part-time job scenario | |
| Schicht-Szenario | Shift scenario | |
| modelo de tarea | ||
| Scenario di lavoro | Work scenario | |
| Bewaarde klus | Saved shift | |
| Настройки смены Nastroyki smeny |
Shift settings | |
| 打工剧本 dǎgōng jùběn |
Work script[note 1] | |
| 打工劇本 dǎgōng jùběn (Mandarin) daa2 gung1 kek6 bun2 (Cantonese) |
Work script[note 1] | |
| 아르바이트 시나리오 aleubaiteu sinalio |
Part-time job scenario |
Salmon Run Next Wave pay grades
| Langue | Nom | Signification |
|---|---|---|
| 評価 hyōka |
Evaluation | |
| Bewertung | Evaluation | |
| Grado | Grade | |
| Valoración | Evaluation | |
| Valutazione | Evaluation | |
| Beoordeling | Evaluation | |
| Должность Разряд Dolzhnost' Razryad |
Job title Grade | |
| 评价 píngjià |
Evaluation | |
| 評價 píngjià (Mandarin) ping4 gaa3 (Cantonese) |
Evaluation | |
| 평가 pyeongga |
Evaluation |
| Identifiant interne | Sens |
|---|---|
| Salmon Run is a co-operative PvE mode. | |
- Job titles (pay grade names)
| # | English | Japanese | Dutch | French | German | Italian | Russian | Spanish (NoA) |
Spanish (NoE) |
Chinese (Simplified) |
Chinese (Traditional) |
Korean |
|---|---|---|---|---|---|---|---|---|---|---|---|---|
| 00 | Apprentice | かけだし アルバイター (Novice Part-Timer) |
Uitzendkracht (temporary worker) |
Néophyte (Novice) |
Azubi (Apprentice) |
Apprendista (Apprentice) |
Рабочий Rabochiy (Worker) |
Aprendiz (Apprentice) |
Aprendiz eventual (Eventual Apprentice) |
新手 打工仔 (Novice Employee) |
新手 打工仔 (Novice Employee) |
초보 아르바이트생 (Novice Part-Timer) |
| 01 | Part-Timer | はんにんまえ アルバイター (Half-Rate Part-Timer) |
Parttimer (part-timer) |
Stagiaire (Intern) |
Teilzeitkraft (Part-time employee) |
Tirocinante (Intern) |
Бригадир Brigadir (Brigadier) |
Subordinado (Subordinate) |
Subordinado eventual (Eventual Subordinate) |
半吊子 打工仔 (Half-Rate Employee) |
半吊子 打工仔 (Half-Rate Employee) |
견습 아르바이트생 (Apprentice Part-Timer) |
| 02 | Go-Getter | いちにんまえ アルバイター (Full-Fledged Part-Timer) |
Vaste kracht (permanent worker) |
Semi-pro | Fachpersonal (Specialized staff) |
Carrierista (Careerist) |
Старший бригадир Starshiy brigadir (Senior brigadier) |
Supervisor | Capataz eventual (Eventual Overseer) |
独当一面 打工仔 (Self-Supporting Employee) |
獨當一面 打工仔 (Self-Supporting Employee) |
일반 아르바이트생 (General Part-Timer) |
| 03 | Overachiever | じゅくれん アルバイター (Skilled Part-Timer) |
Leidinggevende (supervisor) |
Pro | Führungskraft (Executive) |
Promessa (Promising Worker) |
Зам. начальника Zam. nachal'nika (Deputy chief) |
Gerente (Manager) |
Gerente eventual (Eventual Manager) |
熟练 打工仔 (Skilled Employee) |
熟練 打工仔 (Skilled Employee) |
전문 아르바이트생 (Professional Part-Timer) |
| 04 | Profreshional Profreshional Part-Timer[a] |
たつじん アルバイター (Master Part-Timer) |
Baas (boss) Parttime baas[a] (part-time boss) |
Prodige (prodigy) Prodige stagiaire[a] (Intern prodigy) |
Boss Nebenjob-Boss[a] (Side Job Boss) |
Professionista (Professional) Professionista tirocinante[a] (Professional Trainee) |
Начальник Nachal'nik (Chief) Начальник на полставки[a] Nachal'nik na polstavki (Part-time chief) |
Jefe (Boss) |
Jefe eventual (Eventual Boss) |
达人 打工仔 (Master Employee) |
達人 打工仔 (Master Employee) |
달인 아르바이트생 (Master Part-Timer) |
| 05 | Profreshional +1 | たつじん+1 アルバイター (Master +1 Part-Timer) |
Baas +1 (boss +1) Parttime baas +1[a] (part-time boss +1) |
Prodige +1 (Prodigy +1) |
Boss +1 Nebenjob-Boss +1[a] (Side Job Boss +1) |
Professionista +1 (Professional +1) Professionista tirocinante +1[a] (Professional Trainee +1) |
Начальник +1 Nachal'nik +1 (Chief +1) |
Jefe +1 (Boss +1) |
Jefe +1 eventual (Eventual Boss +1) |
达人+1 打工仔 (Master +1 Employee) |
達人+1 打工仔 (Master +1 Employee) |
달인 아르바이트생 +1 (Master Part-Timer +1) |
| 06 | Profreshional +2 | たつじん+2 アルバイター (Master +2 Part-Timer) |
Baas +2 (boss +2)Parttime baas +2[a] (part-time boss +2) |
Prodige +2 (Prodigy +2) |
Boss +2 Nebenjob-Boss +2[a] (Side Job Boss +2) |
Professionista +2 (Professional +2) Professionista tirocinante +2[a] (Professional Trainee +2) |
Начальник +2 Nachal'nik +2 (Chief +2) |
Jefe +2 (Boss +2) |
Jefe +2 eventual (Eventual Boss +2) |
达人+2 打工仔 (Master +2 Employee) |
達人+2 打工仔 (Master +2 Employee) |
달인 아르바이트생 +2 (Master Part-Timer +2) |
| 07 | Profreshional +3 | たつじん+3 アルバイター (Master +3 Part-Timer) |
Baas +3 (boss +3) Parttime baas +3[a] (part-time boss +3) |
Prodige +3 (Prodigy +3) |
Boss +3 Nebenjob-Boss +3[a] (Side Job Boss +3) |
Professionista +3 (Professional +3) Professionista tirocinante +3[a] (Professional Trainee +3) |
Начальник +3 Nachal'nik +3 (Chief +3) |
Jefe +3 (Boss +3) |
Jefe +3 eventual (Eventual Boss +3) |
达人+3 打工仔 (Master +3 Employee) |
達人+3 打工仔 (Master +3 Employee) |
달인 아르바이트생 +3 (Master Part-Timer +3) |
| 08 | Eggsecutive VP | でんせつ アルバイター (Legendary Part-Timer) |
Legende (legend) Parttime legende[a] (part-time legend) |
Légende (Legend) |
Legende (Legend) Nebenjob-Legende[a] (Side Job Legend) |
Dirigente (Executive) |
Гендиректор Gendirektor Генеральный директор[a] General'nyy direktor (General director) |
Director | Director eventual (Eventual Director) |
传说 打工仔 (Legendary Employee) |
傳說 打工仔 (Legendary Employee) |
전설의 아르바이트생 (Legendary Part-Timer) |
- Job titles (pay grade names) (SplatNet 3)
| English | Japanese | Dutch | French | German | Italian | Russian | Spanish (Latin America) |
Spanish (Spain) |
Chinese (Simplified) |
Chinese (Traditional) |
Korean |
|---|---|---|---|---|---|---|---|---|---|---|---|
| Apprentice | かけだし | Uitzendkracht (temporary worker) |
Néophyte (Novice) |
Azubi (Apprentice) |
Apprendista | Рабочий Rabochiy (Worker) |
Aprendiz
(Apprentice) |
新手 | 新手 | 초보 | |
| Part-Timer | はんにんまえ | Parttimer (part-timer) |
Stagiaire (Intern) |
Teilzeitkraft (Part-time employee) |
Tirocinante | Бригадир Brigadir (Brigadier) |
Subordinado
(Subordinate) |
半吊子 | 半吊子 | 견습 | |
| Go-Getter | いちにんまえ | Vaste kracht (permanent worker) |
Semi-pro | Fachpersonal (Specialized staff) |
Carrierista | Старший бригадир Starshiy brigadir (Senior brigadier) |
Supervisor | Capataz (Overseer) |
独当一面 | 獨當一面 | 일반 |
| Overachiever | じゅくれん | Leidinggevende (supervisor) |
Pro | Führungskraft (Executive) |
Promessa | Зам. начальника Zam. nachal'nika (Deputy chief) |
Gerente
(Manager) |
熟练 | 熟練 | 전문 | |
| Profreshional | たつじん | Baas (boss) |
Prodige (Prodigy) |
Boss | Professionista | Начальник Nachal'nik (Chief) |
Jefe
(Boss) |
达人 | 達人 | 달인 | |
| Profreshional +1 | たつじん+1 | Baas +1 (boss +1) |
Prodige +1 (Prodigy +1) |
Boss +1 | Professionista +1 | Начальник +1 Nachal'nik +1 (Chief +1) |
Jefe +1
(Boss +1) |
达人+1 | 達人+1 | 달인 +1 | |
| Profreshional +2 | たつじん+2 | Baas +2 (boss +2)' |
Prodige +2 (Prodigy +2) |
Boss +2 | Professionista +2 | Начальник +2 Nachal'nik +2 (Chief +2) |
Jefe +2
(Boss +2) |
达人+2 | 達人+2 | 달인 +2 | |
| Profreshional +3 | たつじん+3 | Baas +3 (boss +3) |
Prodige +3 (Prodigy +3) |
Boss +3 | Professionista +3 | Начальник +3 Nachal'nik +3 (Chief +3) |
Jefe +3
(Boss +3) |
达人+3 | 達人+3 | 달인 +3 | |
| Eggsecutive VP | でんせつ | Legende (legend) |
Légende (Legend) |
Legende (Legend) |
Dirigente | Гендиректор Gendirektor (General director) |
Director
|
传说 | 傳說 | 전설 | |
Translation notes
Notes
See also
References
- ↑ 1,0 et 1,1
 GameExplain EXCLUSIVE: New Mudmouth Boss in Salmon Run - Splatoon 3 Gameplay. GameExplain.
- ↑ 2,0 et 2,1
 Splatoon™ 3 – Catch up on all the latest from the Splatoon 3 Direct – Official Nintendo Site
- ↑ 3,0 et 3,1
 Inkipedia:Twitter archive/2023/February#1627700600996777985 @SplatoonNA on Twitter
- ↑ Splatoon3 - スプラトゥーン3 攻略&検証 Wiki > Extra Wave
- ↑
 @OatmealDome on Twitter
- ↑
 Levi_Athen_9 on Twitter
- ↑ 7,0 7,1 7,2 et 7,3
 Splatoon™ 3 – Confidential Report: Squid Research Lab dives deep into the Splatlands – Official Nintendo Site
- ↑ 8,0 et 8,1
 Salmon Run Scales and Rewards Explained! - Splatoon 3 Salmon Run
- ↑
 Splatoon 3 - Salmon Run Database
- ↑
 Ultimate Cohozuna Xtra Wave Guide - Splatoon 3 Salmon Run
- ↑
 Splatoon 3 - Salmon Run Next Wave Trailer - Nintendo Switch
- ↑
 HUGE Event Week for Salmon Run - Splatoon 3 Salmon Report
- ↑
 @OatmealDome on Twitter
- ↑ 14,0 et 14,1
 Splatoon 3 - Manual Database
- ↑
 @SplatoonNA on Twitter
- ↑
 @SplatoonNA on Twitter
- ↑
 @NintendoEurope on Twitter
- ↑
 Killjoy_spl on X
- ↑ 19,0 19,1 et 19,2
 Leanny on GitHub
|

